Schoolzine Knowledge Base
- Submit Content
- Training Resources
- School Closures & Remote Learning Support
- Remote Communication Tools
- Getting Started
- Control Centre
- Websites
- DIY eNewsletter
- eNews Builder
- Creating a Stream
- Session Keeper
- SZapp
- SMS
- Communication
- Downloads
- Calendar
- Surveys & Polls
- Managing Contacts
- WONDE
- eForms
- Integrations
- Video Guides
- FAQ's
eNews Builder
- Getting Started With Your eNews Builder
- Creating an eNews Builder Newsletter
- Quick Access Toolbar
- Creating Content
- Image Formatting Guide
- Sending a Proof of your eNews Builder Newsletter
- Adding Content to Your eNews Builder Article
- Approving and Distributing an eNews Builder Newsletter
- Re-Order your eNews Builder Newsletter
- Copying a eNews Builder Newsletter
- Using the Schoolzine Image ReSZizer for Windows
- Using the Schoolzine Image ReSZizer for Mac
Getting Started With Your eNews Builder
Schoolzine’s eNews Builder Platform is a compact and intuitive system that allows you to build a high-quality online newsletter. It uses smaller Content Elements and Articles to piece together a newsletter that is both easy to build, and easy to access.
If you have any questions or wish to begin the setup for one of our other features, please don't hesitate to contact our Support Team and one of our members can assist you as soon as possible.
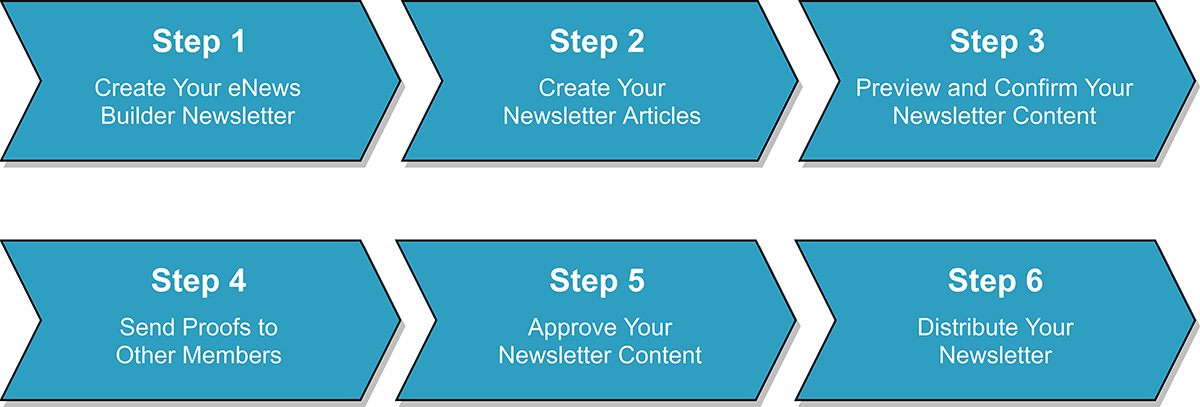
Creating an eNews Builder Newsletter
To begin building your eNews Builder Newsletter, you’ll first need to create the newsletter from within the Control Centre.
- Log in to your Control Centre and select the eNewsletters
- Click the New Newsletter button at the top of the page
- The Newsletter Title field should be populated by the name of the newsletter.
- Click the Publication Box and select the relevant Publication for this newsletter
Note: This will likely be named School Newsletter - Under Advanced Settings, Set the Publish Date and Time fields for your newsletter if applicable
Note: These fields will default to the current date and time if no action is taken - Click Save
Advanced Settings
- Assign Custom Skin is used to apply any Custom Designs such as a one-off 'Christmas Edition' or 'End of Year' edition
- Custom URL can be used to render your newsletter on a different URL to the default for your publication
Note: This must be a unique address each newsletter - Table of Contents is an Index of articles that displays at the top of the newsletter. This is turned on by default
- Newsletter Filter will add a filter tab to the top right of the newsletter. Expand this to search for Keywords or Tags within the newsletter
- Hide Archive can be used for special editions of your newsletter, that you would like to omit from the regular Newsletter Archive page
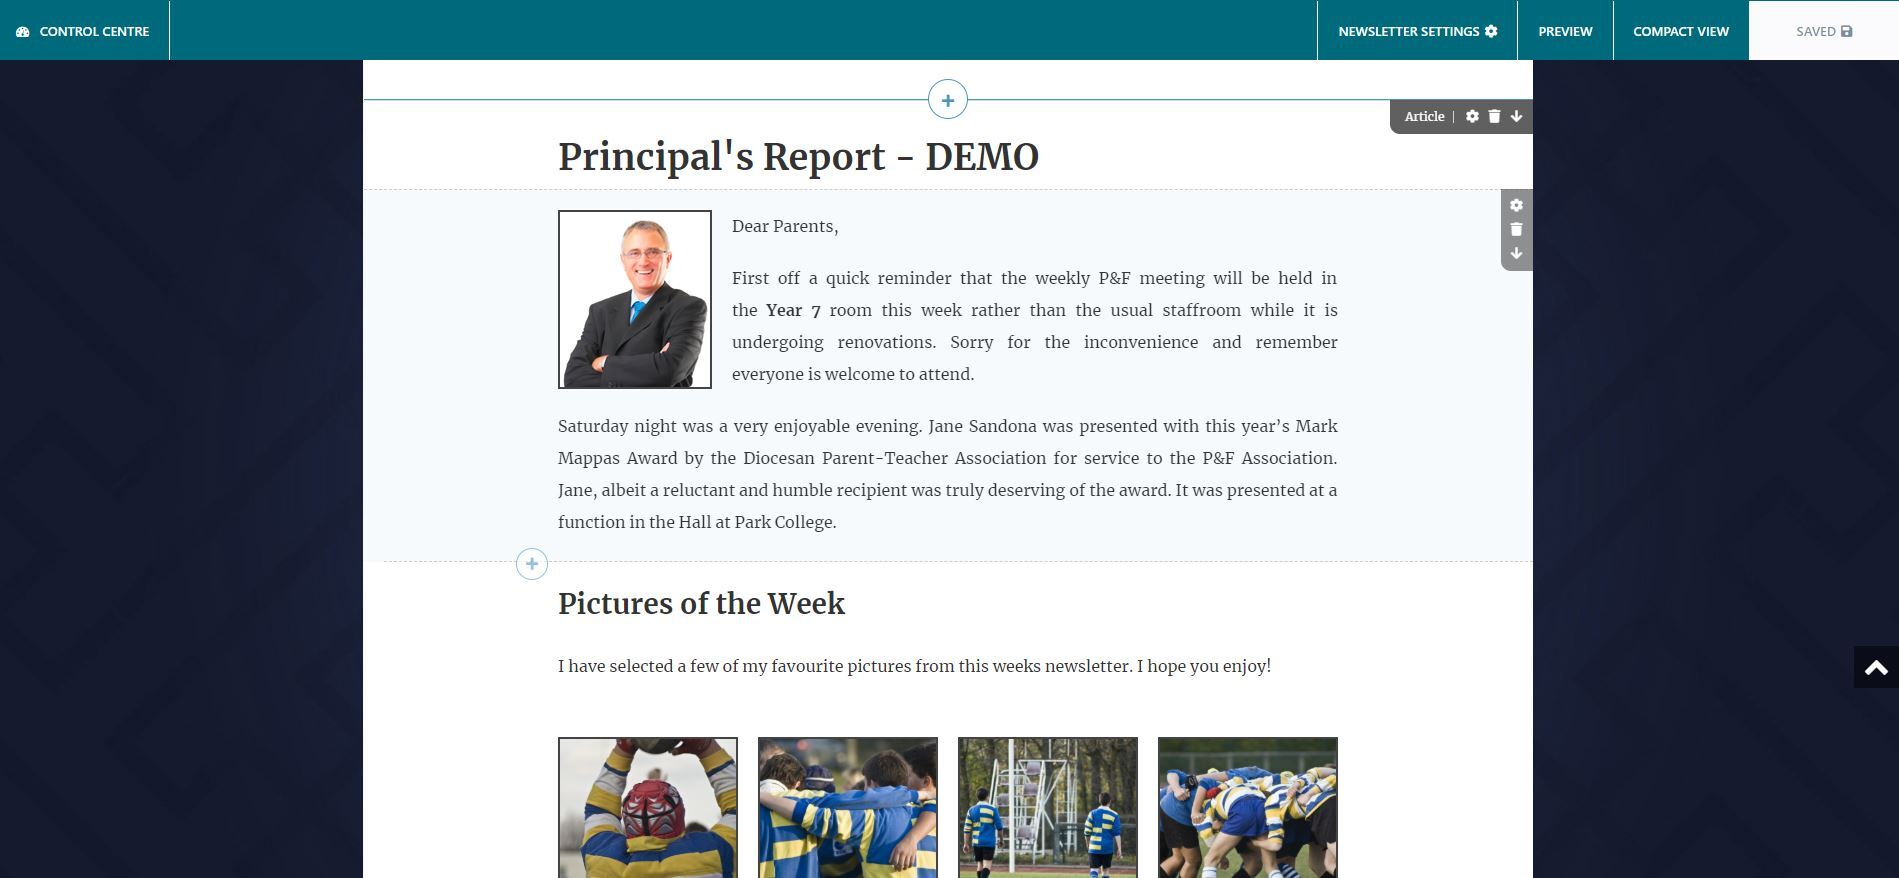
Quick Access Toolbar
Your eNews Builder newsletter comes equipped with a Quick Access Toolbar. This option allows you to quickly access various options for your newsletter.
Control Centre
This option allows you to quickly navigate back to your Control Centre.
Newsletter Settings
This option allows you to access and edit a limited selection of your eNews Builder Newsletter’s Settings. The available options to be adjusted are:
- Publication: Quickly change the newsletter’s assigned Distribution Settings
- Skin: Quickly change the newsletter’s assigned Design Settings
- Indexing: Toggle the Table of Contents for your newsletter
Please Note: We recommend disabling the Table of Contents on any newsletter with 3 or less articles. This is to aid with creating a more streamlined view for your readers
Please note: You will need to refresh your page before the above changes will be applied. See below for some Keyboard Shorcuts to refresh your page:
For Windows: Ctrl + F5
For Mac: Cmd + R
Preview
This option allows you to access a preview of your eNews Builder Newsletter in its current state. Use this option to view your newsletter in the format your readers will receive.
You can also use this option to preview how your newsletter will render on different devices, such as Mobile and Tablet devices.

The device options are as follows (Listed Left to Right)
- Desktop View
- Tablet Device - Landscape Orientation
- Tablet Device - Portrait Orientation
- Mobile Device - Landscape Orientation
- Mobile Device - Portrait Orientation
Compact View
This option allows you to edit your newsletter without rendering the Top and Side Menu items and allows you to focus on constructing the content for your newsletter.
Please note: This will not remove the options for all users, it will only hide them for your own user during the editing process.
Save Changes
This option will save any current changes you have made on your newsletter and allow them to be viewed from the Preview option mentioned above. The eNews Builder Platform will automatically save every 60 seconds if a change has been detected.
However we still recommend to save your work often to avoid any loss of content.
Creating Content
The eNews Builder newsletter allows you to effortlessly create articles for your newsletter and share these with your community.
To begin building your newsletter, follow the below steps:
- Log in to your Control Centre and select the eNewsletters
- Click the Newsletter Name that you want to edit
- Select the Edit Content button to open up the eNews Builder editor
- Select the + Icon to expand the ribbon, and select the desired Article Type or link existing eNews Builder Articles or Events
Important: 'Legacy' articles created from within the Control Centre will not be available from your library, and you will only be able to select 'eNews Builder' Articles constructed via the front end - Add and Style your content

Important
eNews Builder Newsletters are designed to be created in multiple smaller content elements instead of being created all in one large article.
Schoolzine recommends creating your newsletter one content element at a time, instead of creating the entire article/newsletter content in one block.
Editing Article Settings
You can edit the Settings of your Article’s at any stage by selecting the Cog Icon located in the top right-hand corner of your Article Element and adjust your settings as needed.

You can also use the Bin Icon to remove the content from your newsletter.
Please note: If your Article is only linked to a single newsletter, and it is deleted with the Bin Icon then your newsletter is saved, it will delete the content from your account entirely. You will need to recreate the content to re-add it to the newsletter. If your article is linked to multiple newsletters, the Bin Icon will only unlink it from the currently edited newsletter.
Reordering your Articles
You can use the Arrow Icons to move your Articles either up, or down within your Newsletter. Please note that if you move the Article, it will also move all Content Elements contained within this Article with it.
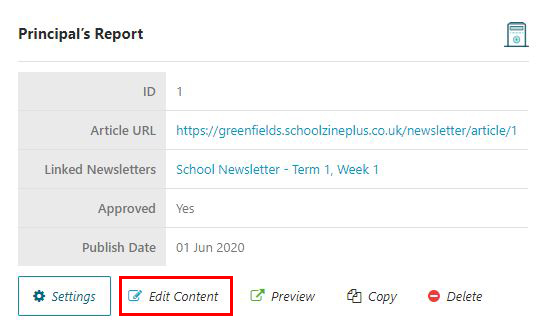
Editing Articles from the Control Centre
You can locate and edit an Article from the Schoolzine Control Centre rather than editing from the Newsletter. To edit an Article in this way, follow the below steps:
- Navigate to the Content Menu Tab
- Select Articles
- Locate your Article and click the Article Name
- Select Edit Content
Types of Articles

Text Article
This Article Type populates with a Heading and Text Content.
To create your Article content, simply select the placeholder text to delete and add your own content.
Text Article Settings

When using the Edit Cog for your Text Article, it will give you access to the following options:
- Featured Image: This option allows you to upload or select a previously uploading image as a Featured Image on your Article
- Summary: This option will allow you to add a Summary for your Article
- Approved: This slider option will allow you to toggle the Article in the approved status
- Indexing: This slider option will toggle the visibility of this Articles Header from the newsletter’s Table of Contents
- Print Only: This slider option will make this Article only show in the printed view of your newsletter
- No Print: This slider option will make this Article only show in the online view of your newsletter
- Tags: This drop down option allows you to select any number of tags that may be relevant to your Article
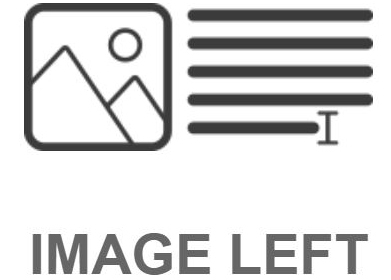
Image Left
This Article Type populates with a Heading, Text Content and an Image floated to the left of the text.
To add your image:
- Click the default Image holder
- Select the Upload button (or select one from your Media Library using the Browse button)
- Select Choose file and select the image from your system
- Select Upload
- Select your Image Style
If you need a border on your image select Border otherwise select No Border
To create your article content, simply select the placeholder text to delete and add your own content.
Image Left Article Settings
When using the Edit Cog for your Image Left Article, it will give you access to the following options:
- Featured Image: This option allows you to upload or select a previously uploading image as a Featured Image on your Article
- Summary: This option will allow you to add a Summary for your article
- Approved: This slider option will allow you to toggle the article in the approved status
- Indexing: This slider option will toggle the visibility of this Articles Header from the newsletter’s Table of Contents
- Print Only: This slider option will make this Article only show in the printed view of your newsletter
- No Print: This slider option will make this Article only show in the online view of your newsletter
- Tags: This drop down option allows you to select any number of tags that may be relevant to your Article

Image Right
This Article Type allows you to have a Heading, Text Content and an Image floated to the right of the text.
To add your image:
- Click the default Image holder
- Select the Upload button (or select one from your Media Library using the Browse button)
- Select Choose file and select the image from your system
- Select Upload
- Select your Image Style
If you need a border on your image select Border otherwise select No Border
To create your article content, simply select the placeholder text to delete and add your own content.
Image Right Article Settings
When using the Edit Cog for your Image Right Article, it will give you access to the following options:
- Featured Image: This option allows you to upload or select a previously uploading image as a Featured Image on your Article
- Summary: This option will allow you to add a Summary for your Article
- Approved: This slider option will allow you to toggle the Article in the approved status
- Indexing: This slider option will toggle the visibility of this Articles Header from the newsletter’s Table of Contents
- Print Only: This slider option will make this Article only show in the printed view of your newsletter
- No Print: This slider option will make this Article only show in the online view of your newsletter
- Tags: This drop down option allows you to select any number of tags that may be relevant to your Article

Full Media
This Article Type will add a Heading, Text Content and two media options. An option for adding Two Images and a Video Embed option.
Full Media Article Settings
When using the Edit Cog for your Full Media Article, it will give you access to the following options:
- Featured Image: This option allows you to upload or select a previously uploading image as a Featured Image on your Article
- Summary: This option will allow you to add a Summary for your Article
- Approved: This slider option will allow you to toggle the Article in the approved status
- Indexing: This slider option will toggle the visibility of this Articles Header from the newsletter’s Table of Contents
- Print Only: This slider option will make this Article only show in the printed view of your newsletter
- No Print: This slider option will make this Article only show in the online view of your newsletter
- Tags: This drop-down option allows you to select any number of tags that may be relevant to your Article

Link Article
This Article Type allows you to select a previously created eNews Builder article.
- Select the Link Article Article Type
- Find the Article you want to link and press the INSERT button on the Right-Hand Side
Note: You can search for your Article Title using the Search Box in the Top Left-Hand Corner
IMPORTANT!
If you make any changes to Articles which are linked to multiple newsletters, it will adjust the content in ALL linked newsletters.
If you wish to create a copy of the content of a prior newsletter, you can select the COPY button when you are searching for an Article. This will create a separate duplicate which you can edit and change for the new instance.
Please note: you are unable to link any pre-existing 'Legacy' Articles created under the Legacy DIY Newsletter Platform. Any Articles you wish to include in your content will need to be recreated in the eNews Builder interface.

Link Event
This Article Type allows you to select a previously created Event.
- Select the Link Event content type
- Search for the Event you want to link and press the INSERT button on the Right-Hand Side
Note: You can search keywords for your Event Name using the Search Box in the Top Left-Hand Corner
Linked Event Settings
When using the Edit Cog for your Linked Event, it will give you access to the following options:
- Featured Image: This option allows you to upload or select a previously uploading image as a Featured Image on your Article
- PDF Flyer: This option allows you to upload or select a previously uploaded PDF file to be used as a flyer for your event
- Flyer Text: This option allows you to edit the display text for your attached PDF flyer
- Start/End Date: This option allows you to edit the start/end date of your event
- Start/End Time: This option allows you to edit the start/end time for your event
- All Day: This option allows you to set the event as an All Day event
Please note: If this is enabled, you will no longer be able to set a Start/End Time of your event - Approved: This slider option will allow you to toggle the article in the approved status
- Indexing: This slider option will toggle the visibility of this Articles Header from the newsletter’s Table of Contents
- Print Only: This slider option will make this Article only show in the printed view of your newsletter
- No Print: This slider option will make this Article only show in the online view of your newsletter
Image Formatting Guide

The formatting of your newsletter plays a big part in how easy it is to read. To assist you in this, we have put together this guide to help you format your images in a way that best suits the layout of your newsletter.
Below are some examples of a few ways that you can display the images in your newsletter. We have used pixels to indicate the best image sizes for each of these formats. You are able to use the Schoolzine Image Resizer to adjust your images to these sizes.
The maximum width of the Newsletter is 780 Pixels wide, if an image is uploaded that is larger than 780 Pixels wide, then it will automatically be resized to fit within the constraints of the article.
Please note that the sizes outlined below are listed as suggestions for image size, and images can be added as any size, as long as it fits withing the 780 Pixel Width of the Newsletter Article. These suggestions are offered to make the most out of your newsletter design.
Single Image - Landscape Orientation - Centre Alignment
The Maximum width of the Newsletter Articles are 780 Pixels. If you are wanting to include a Single Landscape Orientation Image, then you should aim to resize the images to 550 Pixels for optimal placement within your content. However, Images can be sized up until 780 Pixels if the readability/visibility of the image is questionable.
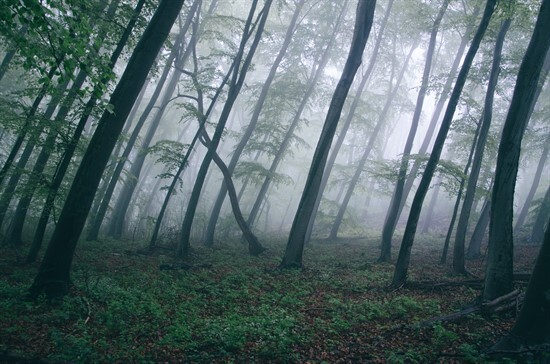
Single Image - Sized to 550 Pixels
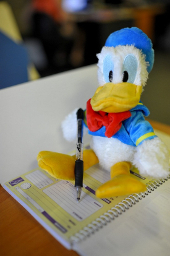
Single Image - Portrait Orientation - Centre Alignment
If you are wanting to include a Single Portrait Orientation Image, then you should aim to resize the images to 400 Pixels for optimal placement within your content.
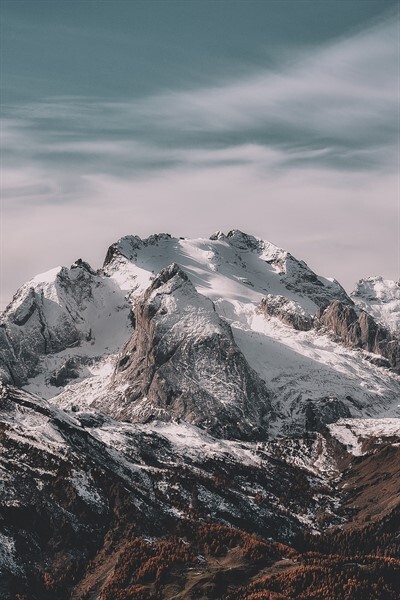
Portrait Image - Sized to 400 Pixels
Please note: If the image is particularly tall, then you might want to consider resizing to a smaller size. These images can often take up a lot more space than is recommended due to their unusually large height dimensions. Please see our example below of a tall Portrait Image sized to 400 pixels.

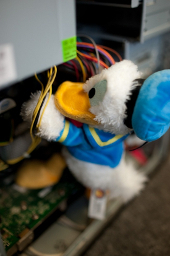
Two Images Centre - Centre Alignment
If you are wanting to include Two Images side by side, then you should aim to resize the images to 265 Pixels Wide, and of Equal Height for optimal placement within your content. However, Images can be sized up until 380 Pixels Wide, and of Equal Height if the readability/visibility of the image is questionable.
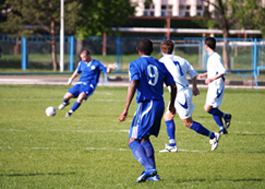

Two Images - Sized to 265px width
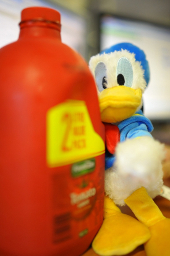
Image Two Mixed - Centre Alignment
Image Two Mixed refers to any Two Images side by side that are of different orientations. To resize these, you should aim to resize the images accordingly. The Landscape image should be resized to 340 Pixels Wide, and the Portrait image should be resized to 190 Pixels Wide, with the Height of both images made equal.


340px width - 190px width
Image Height Set to 255px height
Image Three Centre - Centre Alignment
If you are wanting to include Three Images side by side, then you should aim to resize the images to 170 Pixels Wide, and of Equal Height for optimal placement within your content. However, images can be sized up until 240 Pixels Wide, and of Equal Height if the readability/visibility of the images is questionable.
Three Separate Images - Sized to 170 Pixels
Floated Images
Floated Images refers to any Image that is added to be floated next to article content. The size of these images will vary depending on the type of image you are wanting to include. However typically your floated image should range between 200 Pixels Wide, and 125 Pixels Wide, with the Height of both images made equal.
Some recommended sizing options for floated images are listed below:
Staff/Face shot Image: 125 Pixels Wide - 175 Pixels High
Logo Image: 150 Pixels Wide
Full Image being made into a Float: 200 Pixels Wide
Image Gallery
Image Galleries refer to a group of 4 or more Images added into a single element. Gallery images should be resized to 600 Pixels High. Due to the Gallery Element rendering the preview of these items automatically, the width of the images can be ignored. By sizing to 600 Pixels High, this allows the image to be as large as possible, while having a minimal effect on the load times for your newsletter. The images added to your Gallery will be initially displayed alphabetically. The order of the images can then be further adjusted by editing your Gallery Element, further information on this step can be found at the link below.
Please note: There is no upper limit to the number of images that can be included within a gallery, however the more that is included, the longer it will take your newsletter to render. User discretion is advised.
View the link below for instructions on how to add a gallery.
Click here for the Adding Content to Your eNews Builder Tutorial

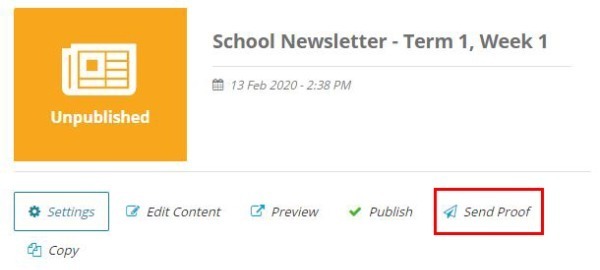
Sending a Proof of your eNews Builder Newsletter
The Send Proof functionality allows you to send through a digital copy of your newsletter for review to other staff members, prior to publishing and distributing to your community. The URL is unique and not public, allowing you to have other staff members give the final signoff without needing access to the Control Centre.
- Log in to your Control Centre and select the eNewsletters
- Click on the eNews Builder Newsletter that you would like to send the proof from
- Select Send Proof from the ribbon and a popup window will appear
- Type in the email, or multiple emails separated by a comma, that you would like to send the proof to and click Send
- The recipient will receive a newsletter link to their email, allowing them to proof the newsletter, without your content being fully published and visible to your community
Adding Content to Your eNews Builder Article
When creating your articles, you may be required to insert additional media or text sections. You can achieve this by using the Article Editor options located at the bottom of your Article.

Editing Your Content
You can edit the Settings of your Content Element’s at any stage by selecting the Cog Icon located in the top right-hand corner of your Content Element and adjust your settings as needed.
You can also use the Bin Icon to remove the Content Element from your newsletter.
Reordering your Content
You can use the Arrow Icons to move your Content Elements either up, or down within your Article.
Please note: If you need to move a Content Element from one Article to another, you will need to recreate the Content Element in the new Article. The Arrow Icons will not allow you to move Content Elements between Articles.

Text
Allows you to add additional Text Items or Sub-Articles to your existing Article.
To add a Sub-Heading, highlight your desired text and select the H3 (Heading 3) or H4 (Heading 4) option based on the type of heading you wish to create.
Text Formatting
To apply formatting to your Text Content, simply highlight the text you wish to format. The below Toolbar will appear and you will be able to select your desired formating.

Numbered/Bullet List
These options will allow you to create a Numbered or Bullet List item for your newlsetter.
Pull Quote
This option will allow you to apply the Pull Quote style to your text.
This is best suited to draw attention to a particular piece of text within your Article. An example has been added below:

Table
Using this icon will allow you to create a Table for your Content Builder Newsletter.
- Select the Table Icon
- Use the Table Toolbar to edit the details of your Content. The options available to you are listed below from Left to Right on the Toolbar
Table Properties - Will allow you to edit the options on your Table
Delete Table - Will remove the entire table from the Newsletter
Insert Row Before - Inserts a Table Row before the currently selected Cell
Insert Row After - Inserts a Table Row after the currently selected Cell
Delete Row - Will remove the currently selected Row
Insert Column Before - Inserts a Column before the currently selected Cell
Insert Column After - Inserts a Column before the currently selected Cell
Delete Column - Will remove the currently selected Column
You can also open the Table Formatting Tools by right clicking on your table for further customisation options.

Wildcard
A Wildcard is a string of code that will automatically pull information from your system and display it within your newsletter.
This option will enable you to add predetermined Wildcards into your newsletter. Simply select the field and pick they Wildcard you would like to insert.
Please note: The Wildcards will only display when you preview the content. During the editing process, you will only be able to see the Wildcard Code, and not the information it is set to retrieve from your account.
Text Settings
When using the Edit Cog for your Text Content Element, it will give you access to the following options:
- Layout: This option lets you toggle between the available layout options for your Content Element
Text with Left/Right Image Settings
When using the Edit Cog for your Text with Left/Right Image Content Element, it will give you access to the following options:
- Image: This option allows you to upload or select a previously uploaded image to include within your Content Element
- Image Style: This option allows you to add or remove a border around your added image
- Layout: This option lets you toggle between the available layout options for your Content Element

Image
Allows you to add Images to your Article.
To add an Image:
- Click the default Image holder
- Select the Upload button (or select one from your image library using the Browse button)
- Select Choose file and select the image from your system
- Select Upload
- Select your Image Style
If you need a border on your image select Border otherwise select No Border
You can adjust the image alignment using the Image Alignment dropdown item.
You can also adjust the layout to include one, two or three images using the Layout dropdown item. Note: The Two (Mixed) item is used for images that have different widths. You will also have a field to adjust the image’s Height, this number will be listed in pixels. See the example below:

Image Settings
When using the Edit Cog for your Image Content Element, it will give you access to the following options:
- Image: This option allows you to upload or select a previously uploaded image to include within your Content Element
- Image Style: This option allows you to add or remove a border around your added image
- Image Alignment: This option allows you to apply an alignment setting for your image
- Layout: This option lets you toggle the number of images that are to be included in this Content Element

Link Button
Allows you to add a Button linked to an external source.
To add your link button:
- Click the button that is created
- If the button is for a document or other file:
Click the Upload Icon to upload a new file
Click the Search Button to search for a previously uploaded file - If the button is for an external website:
Change the URL field to the desired web address
Change the Name to best reflect the source of your button
Example name: Click here to view the Schoolzine Website
or
Click here to download the SZapp Flyer - Turning on the Hide URL slider will hide the URL field content from the newsletter
- Adjust the Icon dropdown to best reflect the source of your button
Link Button Settings
When using the Edit Cog for your Link Button Content Element, it will give you access to the following options:
- Document: This option allows you to upload or select a previously uploaded document to link to your button
- URL: This option allows you to add a URL link that your button will direct to a particular website
- Name: This option allows you to change the text that displays on your button
- Hide URL: This slider will toggle the visibility of the URL when your newsletter is viewed
- Icon: This option allows you to change the icon that displays on the left hand side of the button

Flyer
Allows you to add a PDF Flyer to your newsletter. This option will allow you to both embed the flyer as an image, and include an option to download the full document.
To add your flyer:
- Click the Button that is created
- Click the Upload Button to upload a new file
or
Click the Browse Button to search for a previously uploaded file
The URL field will automatically populate when a file is selected - Change the Text to best reflect the source of your button
Example Text: Click here to download the SZapp Flyer - To show your document as a image make sure the Show Flyer slider is set to Yes
- To show the download link make sure the Show Download Link slider is set to Yes
Note: When using the Show Flyer option, large PDF files might lead to longer than normal load times. If your PDF does not show, please allow extra time for this file to display.
Flyer Settings
When using the Edit Cog for your Flyer Content Element, it will give you access to the following options:
- PDF Flyer: This option allows you to upload or select a previously uploaded document to link to your button
- URL: This option allows you to add a URL link that your button will direct to online PDF document
- Text: This option allows you to change the text that displays on your button
- Show Flyer: This slider option will toggle on an automatically generated visual of your linked document
- Show Download Link: This slider option will toggle the download link for your linked document

Gallery
Allows you to add multiple images in a small area. We recommend using this feature anytime you have more than 3 images in a single section. Please note: There are only two file types that you'll be able to use: JPGs and PNGs.
To add your Gallery:
- Select any of the image boxes created
- Change the Gallery Name to apply a caption to your Gallery
- To show your Gallery Name make sure the Show Gallery Title is set to Yes
- Click the Upload button to upload new files
or
Click the Browse Button to search for previously uploaded files
Note: You can filter by previously used Galleries using the Gallery/Folder drop down item. Simply select the images you wish to insert and press the Add button
Gallery Settings
When using the Edit Cog for your Gallery Content Element, it will give you access to the following options:
- Gallery Name: This option allows you to edit the title for your gallery
- Show Gallery Title: This slider option will toggle the visibility of the gallery within your newsletter
- Add Images to Gallery: This option allows you to upload or select previously uploaded
Please note: You can also use this section to rearrange the uploaded images by clicking and dragging the images into the correct order - Image Style: This option allows you to add or remove a border around your added image
Helpful Hints
You can also rearrange the order of your Gallery Images. Simply open the settings for your Gallery Content Element, there will be a preview of your images towards the bottom. Simply Click and Drag to rearrange the images into the correct order.
You can also Remove or Replace images within a gallery by hovering your mouse over the image in question and selecting the appropriate Icon.


Video
Allows you to add a YouTube or a Vimeo video.
To add your video:
- Add the Video URL to the URL field
- Change the Type to reflect the source of your URL
- To manually adjust the size of your video embed, change the Responsive slider to No and input your desired pixel dimensions
Note: Schoolzine recommends leaving the Responsive slider as Yes to keep all content uniform - To show related videos once your video stops playing, change the Show Related slider to Yes
Video Settings
When using the Edit Cog for your Video Content Element, it will give you access to the following options:
- URL: This option allows you to add your link to the desired video
Please note: Only YouTube and Vimeo links will work with this Content Element - Type: This option allows you to set the type of link you are inserting. The system will automatically select the appropriate option
- Responsive: This slider allows you to toggle the ability to set specific dimensions for your Video Content Element
Please note: If you leave this as yes then you video will automatically be set to the maximum size allowed - Show Related: This slider option toggles the option to show related videos once your video has finished playing

Audio
Allows you to add a link to an Audio file to include in your newsletter.
To add your audio:
- Click the default Audio Embed
- Select the Upload button (or select one from your Media Library using the Browse button)
- Select Choose file and select the Audio File from your system
- Select Upload
- Alternatively: You can add the direct URL to your Audio File in the URL field
Audio Settings
When using the Edit Cog for your Audio Content Element, it will give you access to the following options:
- Audio: This option allows you to upload and select a previously uploaded file to include in your newsletter
- URL: This option allows you to add a URL directly to a file hosted on an external website
- Name: This option allows you to apply a name to the audio embed

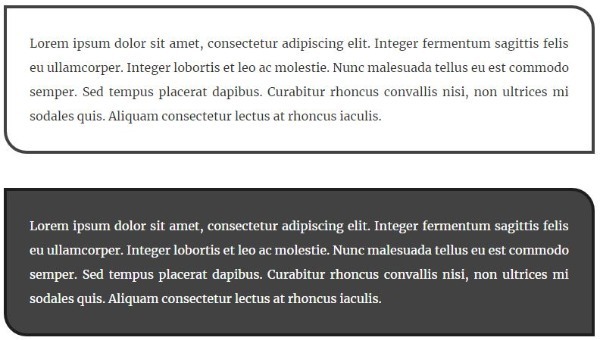
Border/Colour Box
Both of these options add a similar styled decorative box to place content within. This is usually used to draw attention to particular pieces of information. Please see below for examples of how these items display.
Border/Colour Box Settings
When using the Edit Cog for your Border/Colour Box Content Element, it will give you access to the following options:
- Border Colour: This option allows you to edit the border colour for your element
- Background Colour: This option allows you to edit the background colour of your element
- Text Colour: This option allows you to edit the text colour of your element
- Layout: This option allows you to edit the current layout of your element. The available options are:
Text
Text with Left Image
Text with Right Image
Text with Image Above
Text with Image Below
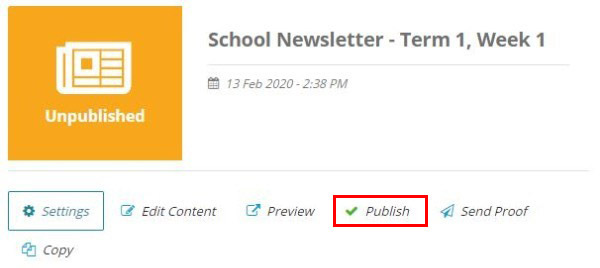
Approving and Distributing an eNews Builder Newsletter
Once your newsletter is ready to send to your community, you can login to your Control Centre and approve and distribute your newsletter all in one place.
- Log in to your Control Centre and select the eNewsletters menu tab
- Click the Newsletter name of the issue you'd like to distribute
- Select the Publish button
- If you'd like to preview the finished newsletter before distributing it, select Publish newsletter without distributing
Note: Doing this will enable the option to select the Preview button seen in the image above - If you're ready for the newsletter to be sent, choose the Send Date and Time, and select either Auto send without review or Review before distribution
Auto send without review: This option will send your newsletter to all contacts specified by your Distribution Settings with the default email and/or SZapp content setup for your account
Review before distribution: This option will allow you to edit your distribution settings and message content prior to distribution. Please note that this will only edit the content for this single newsletter. For any lasting changes, please contact Schoolzine for assistance
Note: If the newsletter has already been published, select the Unpublish button, and then re-select the Publish button to display the below popup.

Re-Order your eNews Builder Newsletter
When editing your eNews Builder Newsletter, you may find the need to re-order your list of articles. This can be done quite easily using the eNews Builder interface.
To re-order your Article List:
- Log in to your Control Centre and select the eNewsletters
- Click the Newsletter Name that you want to edit
- Select the Edit Content button
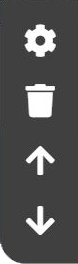
- Move your cursor over your article to show the Article Editor toolbar
The Cog will load the Settings for your article, to be edited when required
The Bin will allow you to Delete an unwanted article
The Arrows will allow you to move an article either Up or Down the Newsletter
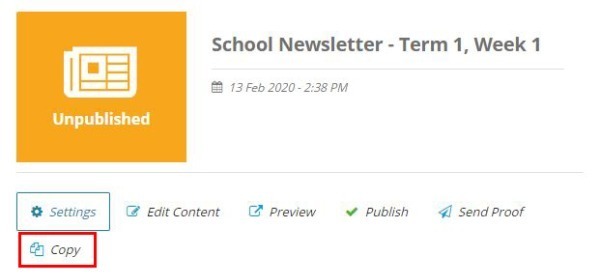
Copying a eNews Builder Newsletter
You have the ability to duplicate an eNews Builder Newsletter. This will allow you to copy the rough structure of a previous newsletter, and simply update to the current content without effecting your old content.
- Log in to your Control Centre and select eNewsletters
- Click the Name of the Newsletter issue you would like to copy
- Select the Copy button to create a duplicate of this newsletter
Note: This will create a duplicate of all Articles created in this newsletter
Editing of the Articles linked to this newsletter will not alter prior issues - Select the Edit button to alter the details of your newsletter
Note: Duplication of your newsletter will default to the current date and time for Publish Date and Time - Select Save and adjust the content of your newsletter as required
Handy Hints
- When copying your newsletter Events will not be duplicated, but will be linked to the newly Copied Newsletter
- Adjusting of Article Content on a copied newsletter will not alter the original Newsletters content
Using the Schoolzine Image ReSZizer for Windows
 Updated Aug 2021
Before uploading your newsletter content, we recommend first reducing the file size of your images by processing them through the Schoolzine Image ReSZizer. This will cut down on the time it takes to upload your files.
You will also be able to adjust the height and width of your images to fit various other features within the Control Centre, such as Side Panels, Emails, Websites and SZapp Notifications.
This software is free and allows you to resize all of your images at the same time.
Installing the ReSZizer
You can install the program by clicking one of the links below. Once downloaded, launch the file and follow the installation steps.
| PLEASE NOTE: If you are having trouble installing the Image ReSZizer due to administration access permissions, you will need to speak to your I.T. Department. |
Click on the video below to view a video tutorial for installing the Schoolzine Image ReSZizer:
Smart Screen Warning
This should only occur for Windows 10 users, however, upon running the ReSZizer installer, you may be greeted with a "Smart Screen" prompt (see image below). If this occurs, just click more information (if applicable), followed by "Run".

Processing Your Images
Click on the video below to view a video tutorial on using the Schoolzine Image ReSZizer:
Before you get started, make sure your Images folder contains all relevant image files and galleries.
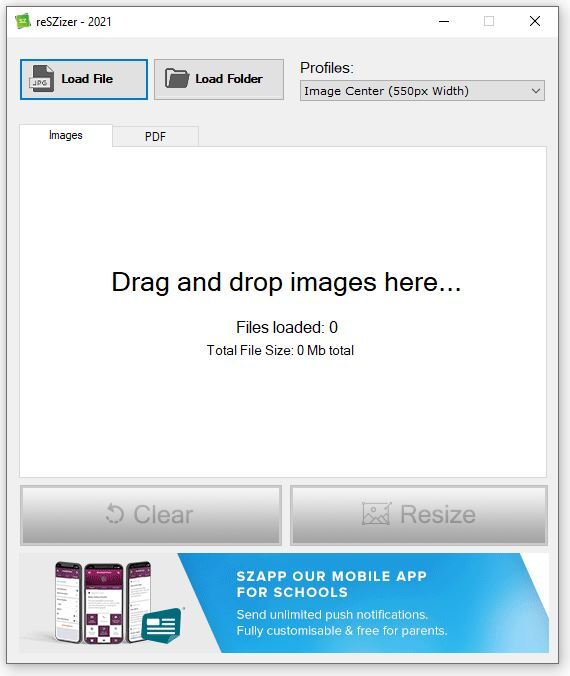
- Open the ReSZizer application.
- Click and Drag your Images folder into the box labeled Drag and drop images here.
Note: You can also choose the files you wish to resize by clicking the Load File or Load Folder button at the top of the ReSZizer and navigating to your Images folder, then clicking Open. - To resize a single image, or to select images individually, click the Load File button at the top of the ReSZizer.
- Set the Profile to the appropriate setting.
Note: If you're unsure, set the profile to Image Centre. This is the default setting and perfect for resizing images for your newsletter content. - Click Resize.
Processing Your PDFs
This function is the easiest way to create image files from your PDFs and is perfect for if you'd like a visual to accompany your downloadable file.
- Open the ReSZizer application.
- Select the PDF tab.
- Click and Drag your PDFs into the box labeled Drag and drop PDF's here.
Note: You can also select your PDFs by clicking the Load File or Load Folder button at the top of the ReSZizer and navigating to your Attachments folder, then clicking Open. - Set the Profile to Convert to JPG (Default width).
- Click Resize.
Profiles
You are able to control what dimensions your images are sized to by assigning a Profile before you click Resize.
Image Profiles
- Profile Photo - 125px width, commonly used for staff photos.
- Logo - 150px width.
- Image Float– 200px width, commonly used for images placed beside text.
- Side Panel – 220px width.
Note: This is the Profile you will set if you are resizing images to fit into the Side Panel of your newsletter. - Image x2 Center - 265px width, commonly used for two landscape images side-by-side.
- Portrait - 400px width, commonly use for portrait orientation images that will be centered.
- Newsflash – 500px width.
Note: This is the Profile you will set if you are resizing images to fit into an Email Newsflash. - Image Center– 550px width.
Note: This is the Profile that you will set if you are resizing images to fit into the content of your newsletter. - Gallery – 600px height.
- Design – 2000px width, can be used to compress files before sending to the Design Team.
PDF Profiles
- Convert to Jpeg (Default Width) – Converts the document to an image using the dimensions of the PDF
- Convert to Jpeg (600px Width) – Converts the document to an image and then scales it to Flyer size
For more information on the best profiles to apply to your images for resizing, see the guide below:
Images Showing as Wrong Orientation
Images contain certain background information known as Meta-Data that control varying aspects of the image, such as Size, Rotation, Preview Text, etc. Both your Desktop Computer and online platforms such as the Schoolzine Control Centre can interpret this background Meta-Data in different ways. This can lead to images being the correct orientation on your desktop computer but display incorrectly once uploaded online.
How can I resolve this?
You can use the Schoolzine Image Resizer to reset the Meta-Data of your images. Simply make sure they are the correct orientation on your Desktop Computer, then run them through the Schoolzine Image Resizer. Even if your images have been resized previously, this will reset the Meta-Data to the correct Orientation.
I have used the Schoolzine Resizer to reset the Meta-Data, but the images are still the wrong orientation.
Occasionally the Meta-Data can be locked onto the image and the Schoolzine Image Resizer is unable to reset it correctly. To resolve this you can follow the below steps:
- Add the image into some sort of image editing software
(ie Adobe Photoshop, Microsoft Paint, etc) - Rotate the image to the incorrect orientation
- Save the image
- Rotate the image back to the correct orientation
- Save the image
This should Hard Reset the Meta-Data on the Image and set the Orientation to the Correct Orientation.
Using the Schoolzine Image ReSZizer for Mac

Before uploading your newsletter content, we recommend first reducing the file size of your images by processing them through the Schoolzine Image ReSZizer. This will cut down on the time it takes to upload your files.
You will also be able to adjust the height and width of your images to fit various other features within the Control Centre, such as Side Panels, Emails, Websites and SZapp Notifications.
This software is free and allows you to resize all of your images at the same time.
Installing the ReSZizer
You can install the application in the Desktop App Store by searching for ReSZizer, or by clicking the link below:
Click here to install the ReSZizer
| PLEASE NOTE: If you are having trouble installing the Image ReSZizer due to administration access permissions, you will need to speak to your I.T. Department. |
Processing Your Images
Click on the video below to view a video tutorial on using the Schoolzine Image ReSZizer:
Before you get started, make sure your Images folder contains all relevant image files and galleries.
The ReSZizer will save the resized images over the top of the original files, so if you think you will need the original images later, save a copy of these files to another folder.
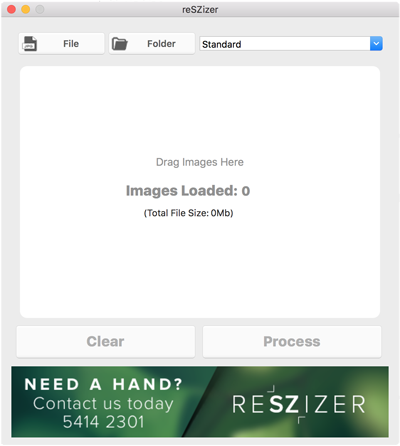
- Open the ReSZizer application.
- Choose the files you wish to resize by clicking the Folder button at the top of the ReSZizer and navigating to your Images folder, then click Open.
Note: You can also Click and Drag your Images folder into the box labeled ‘Drag Images Here’. - To resize a single image, or to select images individually, click the File button at the top of the ReSZizer.
- Set the Profile.
Note: Standard is the default setting and perfect for resizing images for your newsletter content. - Click Process.
Handy Hints
You cannot resize PDF or video files. The Image ReSZizer is for image files only.
Make sure you run your images through the Image ReSZizer before zipping the folder.
Profiles
You are able to control what dimensions your images are sized to by assigning a Profile before you click Process.
- Standard – 600px width.
Note: This is the Profile that you will set if you are resizing images to fit into the content of your newsletter. - Gallery – 600px height.
- Side Panel – 220px width.
Note: This is the Profile you will set if you are resizing images to fit into the Side Panel of your newsletter. - Design – 2000px width.
- Newsflash – 500px width.
Note: This is the Profile you will set if you are resizing images to fit into an Email Newsflash.
For more information on the best profiles to apply to your images for resizing, see the guide below:
Images Showing as Wrong Orientation
Images contain certain background information known as Meta-Data that control varying aspects of the image, such as Size, Rotation, Preview Text, etc. Both your Desktop Computer and online platforms such as the Schoolzine Control Centre can interpret this background Meta-Data in different ways. This can lead to images being the correct orientation on your desktop computer but display incorrectly once uploaded online.
How can I resolve this?
You can use the Schoolzine Image Resizer to reset the Meta-Data of your images. Simply make sure they are the correct orientation on your Desktop Computer, then run them through the Schoolzine Image Resizer. Even if your images have been resized previously, this will reset the Meta-Data to the correct Orientation.
I have used the Schoolzine Resizer to reset the Meta-Data, but the images are still the wrong orientation.
Occasionally the Meta-Data can be locked onto the image and the Schoolzine Image Resizer is unable to reset it correctly. To resolve this you can follow the below steps:
- Add the image into some sort of image editing software
(ie Adobe Photoshop, Microsoft Paint, etc) - Rotate the image to the incorrect orientation
- Save the image
- Rotate the image back to the correct orientation
- Save the image
This should Hard Reset the Meta-Data on the Image and set the Orientation to the Correct Orientation.